
I’m so excited to start what’s going to be a new Little Lewes partnership with The Artworks, a playful, inspiring holiday and half term art activity club for kids run by Julie McLaren and Clare O’leary (see bottom of post for all the details of this half term’s planned fun!). My older son has done a couple of Artworks sessions and has always come back with beautiful things that I want to frame. I know they’re a good fit for Little Lewes.
I approached Julie and Clare as I’m keen to have a bit of variety on this blog – as you may have noticed through the new food/recipe posts. I’m also keen for Little Lewes to be a place where I can collaborate with local people whose work/businesses I admire.
So I asked the Artworks girls to come up with a simple craft project that would be easy enough for people of all ages to do. They came back to me with this ‘Weave a Wonder Box’ step-by-step tutorial. So easy to follow, I think even I can do it (and I love the idea of my receipts hanging on the wall reminding me what an epic tax return fail I am in such an appealingly pretty way).
Oh, that reminds me, happy tax bill week everyone!
Over to you Clare and Julie!
/////////////////////////////////////////////////////////////////////////////////////////////////////////////////////////////////////////
Weave a Wonder Box

This is an art activity suitable for any age – it’s popular with adults as well as little ones and is a great introduction to weaving in its simplest and purest form.
It also develops fine motor skills and hand/eye coordination. It’s a lovely way to re-use and keep your child’s drawings – plus it’s super functional once made.
Suitable for: kids of any age with some help from an adult (and adults of course!)
Time taken: 40 minutes
Materials:

* 20 pages from a magazine/catalogue/old book or annual (you might not use all 20). You can use what you have – it’s also a perfect way to transform the many drawings and paintings made by little hands into something new.
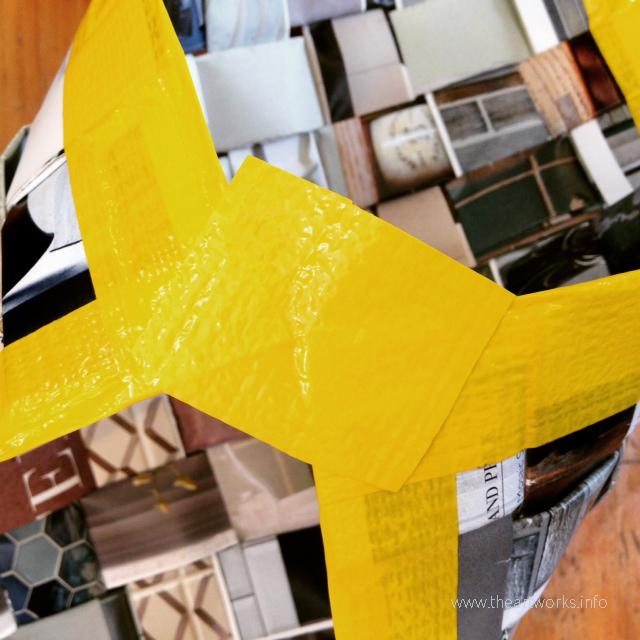
* 1 roll of strong tape (e.g. duct tape). 5cm (2 inch) tape is a good width.
* Decorative flourishes such as buttons, string or thick thread to make a loop to hang your Wonder Box up with.
Instructions
1. Fold each page in half lengthwise, then in half again, and again.
Each strip should be 2cm or 3cm wide, and there should be 20 folded strips, all similar in width and length when you’re done.
2. Lay 10 of the strips next to each other, vertically side-by-side on a flat surface. This is your warp (that’s a weaving term!).

3. Cut one piece of tape approximately 35cm long – you might need an extra pair of hands here to help!
Place the tape horizontally at the top of the strips, so that one half sticks on to the strips, and the other half sticks on to the table. To make this simpler, stick one strip down at a time. Ensure that each strip is stuck down.

Your strips are now stuck to the table and you’re ready to weave.
4. Now, weave your remaining 10 strips individually. This is your weft (that’s another weaving term).

If your first weft strip starts with over, then the next one should start with under, then the next with over. Under > over > under > over, and so on.

While you’re making sure your next weft is woven alternately to the one above it, also ensure each strip is pushed up as much as possible to the previous one to create a nice tight weave.

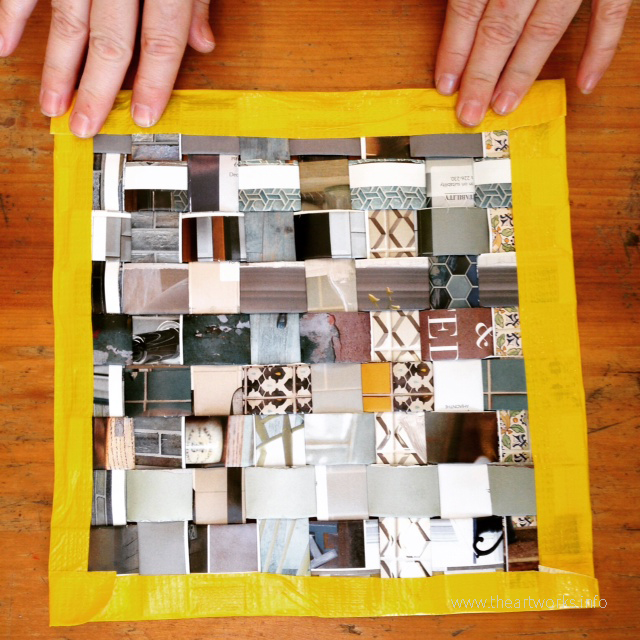
Continue using all your strips until you reach the bottom. You might not need to use all 10 weft strips, but you’re aiming for a tight woven square, so just use as many weft strips as needed. Our example used 10 warp strips and eight weft.
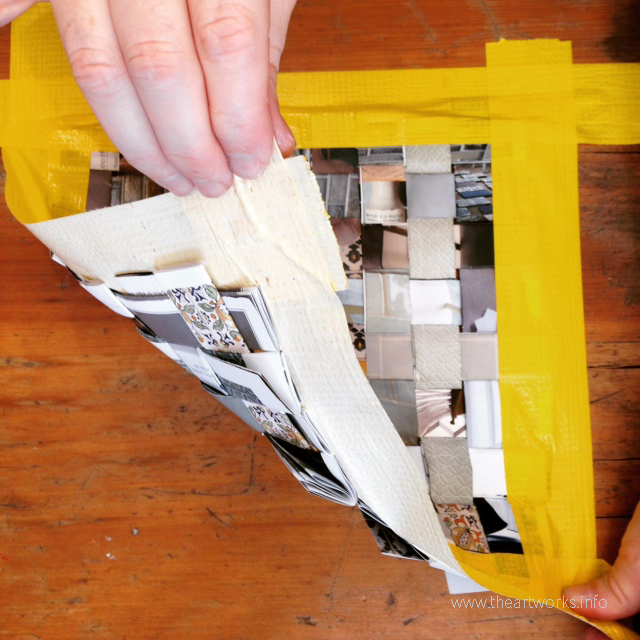
5. Cut three more pieces of tape, each one approximately 35cm long. Stick each piece of tape on to the three remaining side edges of your woven strips – again, half of the tape on the strips, and half on the table.
You now have what looks like a woven flat mat stuck to the table with tape.
6. Forcefully – and you can definitely use force here! – pull the mat off the table surface. The tape should come off the table but remain stuck to your woven mat.
7. Turn the woven mat over and trim any excess tape away from the corners so that each is squared off.
Stick the surplus sticky tape (the edge that’s come off of the table) on to the other side of the mat by folding it over and smoothing it down.

This makes sure that each edge of the mat is sealed in sticky tape and can’t loosen.
8. The mat should feel strong and durable, yet flexible enough to bend without breaking. Now you’ll make it into a wonder box!

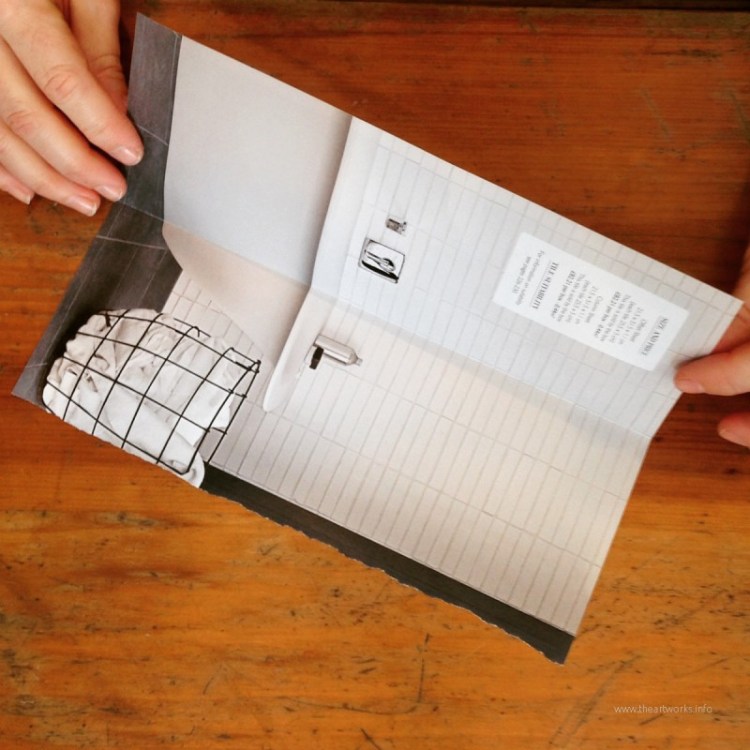
Bend two diagonal opposing corners of the mat towards one another. Use sticky tape to stick the pointed corners together.
9. Now decide which end you’d like the bottom of the box to be. Bring the corner of the bottom into the two corners you’ve just stuck together. Stick this third corner to the other two.

10. Your mat should now look like a woven 3D envelope. Tape the two diagonal gaping joins together.

11. Add any embellishing neon/sparkly/Japanese washi tape to the edges for decorative purposes only!

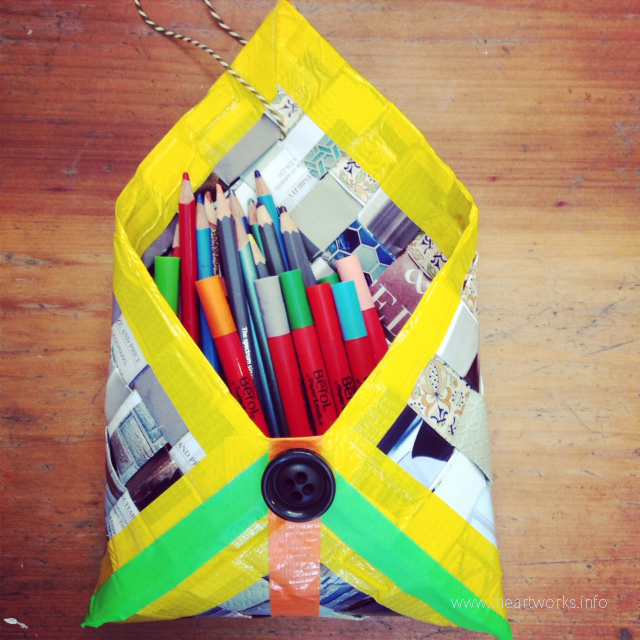
12. Ta-dah! You’ve made your wonder box!
You could use it to safely keep random receipts/toys/pens/Sylvanian family teeny weeny kitchenware in. You could also attach string to it to hang it up somewhere, or add a button on the front and a loop, to turn it into a pouch/bag.
Clare and Julie would like to thank their friend Kirsty McTaggart for her creative hands in their pictures.
/////////////////////////////////////////////////////////////////////////////////////////////////////////////////////////////////////////
WORKSHOPS FOR HALF TERM, FEBRUARY 2015
The Artworks are running their usual imaginative roster of kids’ art workships this half term from their beautiful studio on Valley Road in Lewes.
Dates, times and themes are as follows:
Wednesday 18 Feb * 10am-2pm * Flora and Fauna with Feltmaking
Thursday 19 Feb * 10am-2pm * Decoupage/Collage Your Own Artmaking Tray
Friday 20 Feb * 10am-2pm * Playful Puppets and Marionettes
The cost of a workshop is £18 per child, £16 for siblings. Please pack your kids a lunch of healthy food (no nuts, fizzy drinks or crisps please) and put them in clothes they can make a mess of. Aprons will be provided, but still, don’t let them wear anything fancy.
THE ESSENTIALS
Website: theartworks.info
Tel. no: Julie – 07900 245 563, Clare – 07944 043 539
Disclosure: I approached Julie and Clare about contributing this guest post to Little Lewes as part of a new thing I’m trying to bring more varied and hopefully useful and inspiring content to Little Lewes’s pages. In return I hope it’ll also raise awareness of their workshops, which I know are amazing because my son has done a couple. There are a couple of affiliate links to Hobbycraft within this post, in case people are pushed for time and want to know where to find materials online. There’s also one to John Lewis. No compensation, financial or otherwise, was offered or accepted for the publishing of this post – giving me great content is payment enough!
I’m hoping Julie and Clare will create more great posts like this, so if you like the Wonder Box post and would like to see more ideas from The Artworks on Little Lewes, please spend a little time commenting on it so I can convince them!
Also, if you make your own Wonder Box, we’d like to see it on Instagram – share it with @LittleLewes and with @artworkslewes hashtagging #wonderbox so we can check it out.
// If you’ve enjoyed this post, why not join our adventures by hitting ‘subscribe’ in the side bar. You’ll get the inside scoop on when new posts go live //

These look so fun, thanks for the information on Artworks. Can I just ask, what age are the workshops for?
Hi Kelly
So pleased you like our Wonderbox!
In answer to your question,our Workshops are from age 5-12 years old.
If you’d like more info you can check our website http://www.theartworks.info where there is also a link on the ‘contact us’ page with a booking form.
Happy making!
Clare & Julie from The Artworks